Wednesday 30 September 2015

AirBorne Technologies ToughRock Power Bank Giveaway Winner

AirBorne Technologies ToughRock Power Bank Giveaway Winner
AirBorne Technologies ToughRock Power Bank Giveaway

Our Airborne Technologies ToughRock Power Bank Giveaway has ended a few weeks ago, but due to busy schedule, we were not able to pick the winner immediately and we like to apologize for that. Moving forward, the lucky TeknoGadyet reader that will take home the prize is...

Read more »

Tuesday 29 September 2015

How to turn off 2 step verification in outlook


 turn off 2 step verification in hotmail

 
 turn off 2 step verification in hotmail
  • Visit https://outlook.com/ in the browser you want to authorize more permanently not to require two-step authentication.
  • Type your Outlook.com email address (or an alias for it) under Microsoft account over someone@example.com.
  • Enter your Outlook.com password over Password.
  • Optionally, check Keep me signed in.
  • Two-step authentication will be waived for the browser with Keep me signed in checked or not checked.
  • Click Sign in or press Enter.
  • Type the two-step authentication code received by email, SMS text message or phone call or generated in an authenticator app under Help us protect your account.
  • Make sure I sign in frequently on this device. Don't ask me for a code. is checked.
  • Click Submit.

Monday 28 September 2015

How do I use a Proxy Server?

How do I use a Proxy Server?

Everybody who have used proxies to keep his own privacy in the Internet asked yourself the same question: How much anonymous this particular proxy I'm currently using? In other words whether all my personal data is hidden or only part of it.
There are many different proxy anonymity classifications in the Internet. The simpliest way is to divide all proxies into two parts. First part of proxies are completely anonymous i.e. they hide all your private information. All other proxies are non-anonymous.

Transparent Proxy
This type of proxy server identifies itself as a proxy server and also makes the original IP address available through the http headers. These are generally used for their ability to cache websites and do not effectively provide any anonymity to those who use them. However, the use of a transparent proxy will get you around simple IP bans. They are transparent in the terms that your IP address is exposed, not transparent in the terms that you do not know that you are using it (your system is not specifically configured to use it.)

Anonymous Proxy

This type of proxy server indentifies itself as a proxy server, but does not make the original IP address available. This type of proxy server is detectable, but provides reasonable anonymity for most users.

 High Anonymity Proxies

These proxy servers are called “high anonymity proxy” or "elite proxy". In contrast to other types of anonymity proxy servers they hide a fact of using a proxy:
REMOTE_ADDR = proxy IP
HTTP_VIA = not determined
HTTP_X_FORWARDED_FOR = not determined
That means that values of variables are the same as if proxy is not used, with the exception of one very important thing – proxy IP is used instead of your IP address.


Wednesday 23 September 2015

Kata Philippines Announces Kata Box for Php2,999

Kata Philippines Announces Kata Box for Php2,999

Kata Philippines announced on their Facebook page their newest Android-based product, this time it is not a smartphone or tablet, but a revolutionary set-top box, simply called as Kata Box.

Read more »

Alcatel Flash 2 Launches in the Philippines, 5-inch HD 64-bit Octa Core for Php6,190

Alcatel Flash 2 Launches in the Philippines, 5-inch HD 64-bit Octa Core for Php6,190

Alcatel has officially launched in the Philippines another bang for the buck mid-range smartphone, the Alcatel Flash 2.

Read more »

Tuesday 22 September 2015

Will port KitKat ROM.. Again.

I recently failed to make Kitkat by just porting it and decompiling the boot image for Alcatel OT-4030. This time I will try to build the kernel using dragonpt's kernel code and the incomplete kernel code from Sourceforge. Also thanks to ZonaRMR@XDA for telling me to go at MasterAwesome's thread @ XDA. Ill get started from the kernel after I finish downloading GTA 5 (PC) (I have a weak download speed, it will take like 3-5 days to finish it)

Sunday 20 September 2015

Check Point Mobile Threat Prevention Launches in the Philippines

Check Point Mobile Threat Prevention Launches in the Philippines

Check Point Software Technologies Limited, the world's biggest pure-play security vendor, through Mr. Steve McWhirter, its Vice President for Asia Pacific, Middle East and Africa, launches in the Philippines the latest security solution for mobile devices, the Check Point Mobile Threat Prevention.

Read more »

Sunday 13 September 2015

ASUS ZenPad 7.0 Review, State of Focus

ASUS ZenPad 7.0 Review, State of Focus

INTRODUCTION:

The ZenFone series has become a great hit and very successful, not only in the Philippine market, but also around the globe in general. This huge accomplishment has given ASUS the confidence to venture more in the bigger Android devices and thus, the ASUS ZenPad series was born.

Read more »

Wednesday 9 September 2015

Lenovo A7000 versus Lenovo A7000 Plus

Lenovo A7000 versus Lenovo A7000 Plus

With the official launching and the imminent arrival of the Lenovo A7000 Plus this coming September 15, it is a normal reaction from consumers to ask what are its improvements over the Lenovo A7000, which is its predecessor. To give answers about that question (at least on paper), we prepare the comparison table below.

Read more »

Lenovo A7000 Plus Launches in the Philippines, Available Thru LAZADA for Php7,990

Lenovo A7000 Plus Launches in the Philippines, Available Thru LAZADA for Php7,990

Banking on the popularity of the Lenovo A7000, Lenovo Mobile Philippines officially launched the successor of their fist Dolby Atmos-equipped smartphone, the Lenovo A7000 Plus.

Read more »

Tuesday 8 September 2015

Starmobile PLAY Neo Announced, Comes with FREE 700MB Data Per Month

Starmobile PLAY Neo Announced, Comes with FREE 700MB Data Per Month

Starmobile recently partnered with Smart Communications in launching their latest entry level smartphone, the Starmobile PLAY Neo.

Read more »

How To Remove In App Purchases On Android Apps And Games

First of all, you need to get Lucky Patcher. Download it from HERE. Make sure you download the apk file.
It can normally run on rooted and as well as non rooted phones. In non rooted devices you won't be able to use the tools. But you can use licence emulation, or in other words you get access to half the benefits of lucky patcher when non rooted.


Step 1 : Open lucky patcher.


Step 2 : Tap on the app/game you want to remove in app purchases and select "Open Menu Of Patches". 

Step 3: Tap on "Support patch for InApp and LVL emulation". 

Step 4 : Now You just make sure that 1st and 2nd options are checked, tap on "Apply". 

Step 5 : It takes a while for patching. Then you'll see the patch results. Now you just need to give a Launch. 

Step 6 : It will open the app. As I patched DU Battery Saver so i can upgrade to DU Battery Saver PRO. Thanks to Lucky Patcher I don't have to pay $2.99.


Did Not Understand? Watch this video on YouTube.

How To Remove Ads From Android Apps

Many Android apps are providing you with free service. So they add Google Ads to earn money. Sometimes this  can be really annoying.
In this post I will discuss the method to remove ads from showing up on Android Apps, Games, or even on browsers
.

Step 1 : First of all, you need to get Lucky Patcher. Download it from HERE.
Make sure you download the apk file.
Lucky Patcher allows you to block ads on your Android device. It can normally run on rooted and as well as non rooted phones. In non rooted devices u wont be able to use the tools. But you can use licence emulation, or in other words you get access to half the benefits of lucky patcher when non rooted.


Step 2 : Open lucky patcher.
Step 3 : Tap on the app you want to remove ads and then select "Open Menu Of Patches". 

Step 4 : Tap on "Remove Google ads". 

Step 5 : Now "Patch to remove Google Ads". 

Step 6 : You don't need to check or uncheck anything here, just tap on "Apply". 

Step 7 : It takes a while for patching. Then you'll see the patch results. Now you just need to give a Launch.


Did not Understand? Watch this video on YouTube

Didn't Understand? Watch this 

ZH&K Mobile Odyssey Ultra, 5.5-inch Quad Core Lollipop for Php3,099

ZH&K Mobile Odyssey Ultra, 5.5-inch Quad Core Lollipop for Php3,099

ZH&K Mobile recently introduced several Android Lollipop smartphones, one of them is an affordable phablet named ZH&K Mobile Odyssey ULTRA.

Read more »

New Apps Suggested: Download Manager For Symbian Phones

Hi Guys, today am gonna suggest an app. It accelerates any download process on your phone. You know what I mean?


I was at Trezasan this morning browsing for the latest apps and I meet this Download Accelerator. Its a third party apps and also serves as Download Manager. Onces installed on your Symbian Phone, Download Accelerator would Start Automatically whenever you attempt Downloading (using the inbult browser). This apps is very interesting, one Thing I noticed about the app is that you can easily download a *.jad file as *.jar and have the files saved on your phone for other use.

Download Accelerator has been advance and to me, its beter than using the inbult DM which doesn't pause downloads, any interruption will lead to restarting the process. You know how it felt when downloading is about to complete and suddenly something went wrong. Perhaps, your phone might switch off or so. I experienced this with my Nokai E5 as well.

With Download Accelerator, you can:

  • Pause Downloads
  • Set Minimum Numbers of Downloads
  • Browse FileManager
  • Search Download Apps
  • Inter switch between Downloaded apps and Ongoing Tasks
  • etc.. etc..


Download Internet Download Accelerator here ====> : IDA
Size: 528kb
Exention: sis
Source: MywapBlog

With all the features above, I think Download Accelerator will find a place on your phone and perform the job for you. Its just dope. Stay blessed :-D

Smart Elite Hails Latest UAAP Ambassadors

Smart Elite Hails Latest UAAP Ambassadors

In line with the opening of the University Athletic Association of the Philippines 78th Season, Smart Communications unveiled its young and energetic college basketball players that would represent the Smart UAAP Elite Team.

Read more »

Sunday 6 September 2015

How To Setup Dot Tk Domain In Blogger

Without Wasting Your Time, I Would Like To Discuss The Topic.
So here we go then-
Step 1 : Go To FreeNom.com
Step 2 : Enter your Desired Domain ( you can choose Dot Tk, Dot ml, Dot ga etc) and then check availability. 

Step 3 : In Domain Registration page, set your domain registration length as 12 months. 
Step 4 : Enter a valid email address and verify it. 
Step 5 : Fill up your account form and click on "Complete Order". 
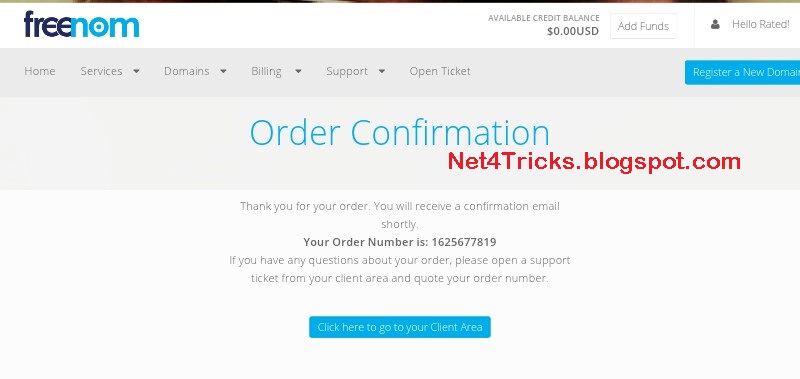
Step 6 : Now you'll see your order no. Click on "Click here to go your Client Area". 
Step 7 : Go to "My Domains" page. In this page you'll see your Desired Domain. Now click on "Manage Domain". 
Step 8 : Click on "Manage Freenom DNS". If you get "Zone not active yet" problem then just go to "Management tools" >>> select Nameservers >>> Use Default Nameserver Button and hit Change Nameservers. 
Step 9 : Select “CNAME” from type option and write “www” in Name and “ghs.google.com” in Target. (Don't close this page) 
Step 10 : In a new tab open your Blogger Settings >>> Basic >>> Blog Address and click on "setup a 3rd party URL for your blog". 
Step 11 : Enter the domain name that been registered on Freenom. Don't forget to add "www" before your domain name. Click on Save. 
Step 12 : Now you'll see an error page. Copy the "Name" and "Target". 
Step 13 : Open your previous tab and click on "More Records". Enter your copied "Name" and "Target" here. Now click on "Save Changes". 
Step 14 : After completion of domain Settings, you have to wait for 3 to 5 minutes and then go to your previous Blogger Setting page and click on Save.
Step 15 : It's all done now. You have successfully setup a Custom URL In your BLOG.

Didn't Understand?? Watch This Video On YouTube


Saturday 5 September 2015

O+ Ultra Review, Extreme Degree

O+ Ultra Review, Extreme Degree

INTRODUCTION:

One of the major concerns of smartphone users is the battery life, especially those people who are on the go and stay longer on the road. If you are one of them, O+ USA has something for you, the O+ Ultra.


Read more »

Wednesday 2 September 2015

PhotoFast Launches i-FlashDrive in the Philippines

PhotoFast Launches i-FlashDrive in the Philippines
Ms. Carol Chen, Vice President of PhotoFast

PhotoFast, a Taiwan based consumer electronics manufacturer that specialized in storage solutions, in partnership with Digits Trading launches in the Philippines the i-FlashDrive.

Read more »

How To Remove The Google Search Bar From Android Homescreen In Lollipop (without root)

Google Search Bar is just waste of time and data. So I would always recommend everyone to open any browser and search anything in rather than to search through the annoying search bar.

Like me I guess everyone wants to get rid of it. Today I would like to discuss two method for this, by disabling Google App and using Custom Launchers.

A. Disable Google App :

Step 1 : Open Your System Settings.
Step 2 : Tap On Apps Manager.

Step 3 : Scroll Down And Tap On The Google App.

Step 4 : Now Tap On "DISABLE".

Step 5 : Reboot Your Phone.
Step 6 : Well It's Done. You Have Successfully Removed The Google Search Bar.

B. Install Custom Launchers :

Every Custom Launcher allows you to tweak and customize your Android device. You just need to install a Launcher from Google play store. Some of the best custom Launchers are Atom Launcher, Apex Launcher, Google Now Launcher, Lollipop Launcher, Nova Launcher etc. You can remove the search bar by just simply disabling Google search bar from launcher Settings.

I have uploaded the 1st method on YouTube. Watch it HERE